
")
AD SURGICAL Pilot Surgical Drills (Ø 2.3 mm)
")
- Item #:
- D015-Pilot Drill
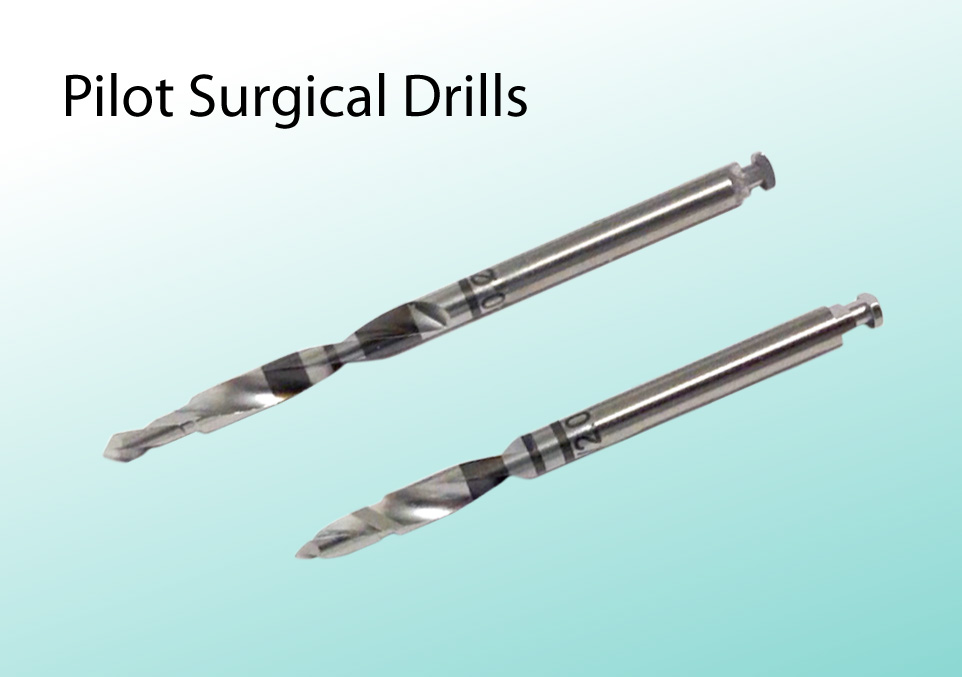
Pilot Surgical Drills (for EZ STENT)
Our Ø2.3mm Pilot Surgical Drills are perfect fit for EZ STENT® and can be used to replace the pilot drills of any dental implant system. They are precision made from high-quality, corrosion resistant surgical stainless steel, and feature standard ISO latch connectivity.
Our pilot drills feature wide-band, easy to see, laser-etched depth markings at 8mm, 10mm, 11.5mm, 13mm and 16 mm. They are available in both long (38mm) and short (30mm) versions to accommodate different vertical clearance. Each drill may be used for up to five preparations, depending on bone density. Made in USA.
- Product Name:
- Pilot Surgical Drills (Ø 2.3 mm)
- Item #:
- D015-Pilot Drill
- Brand:
- AD SURGICAL
- Manufacturer:
- AD Surgical
- samples:
- no
Pilot surgical drills are a type of surgical drill used to prepare the bone for the placement of dental implants. Here are some general guidelines for using pilot surgical drills:
1. Prepare the area: Ensure that the area where the dental implant will be placed is clean and dry. Use a sterile saline solution or other appropriate cleaning agent to remove any debris or bacteria from the area.
2. Choose the appropriate drill: Select the appropriate pilot drill size and length for the planned implant site, based on the manufacturer's instructions and the patient's anatomy.
3. Place the drill: Use appropriate techniques to place the drill into the bone, taking care to ensure that it is accurately positioned and aligned. Use gentle pressure and low speed to avoid overheating or damaging the bone.
4. Prepare the implant site: Use the pilot drill to prepare the implant site, creating a pilot hole for the implant to be placed into. Take care to ensure that the site is clean and free of debris.
5. Remove the drill: Once the implant site has been prepared, carefully remove the pilot drill from the bone, taking care not to damage the surrounding tissue.
6. Repeat as necessary: Depending on the planned implant size and shape, repeat the above steps with successively larger surgical drills to prepare the implant site for the final implant placement.
Overall, pilot surgical drills can be an effective tool for preparing the bone for dental implant placement. By following these general guidelines and using appropriate caution and care, healthcare providers can help to ensure optimal outcomes for their patients.
")
")


")
")


UNIFY Premium+ Fast Absorbing Gut Surgical Sutures, Size 6/0, 18" Thread with 13mm 3/8 Circle R/C Needle. Beige. Box of 12.


UNIFY Chromic Gut Surgical Sutures, Size 6/0, 18" Thread with 13mm 3/8 Circle R/C Needle. Brown. Box of 12.


UNIFY Chromic Gut Surgical Sutures, Size 5/0, 18" Thread with 13mm 3/8 Circle R/C Needle. Brown. Box of 12.


UNIFY Chromic Gut Surgical Sutures, Size 4/0, 18" Thread with 13mm 3/8 Circle R/C Needle. Brown. Box of 12.


UNIFY Nylon Surgical Sutures, Size 4/0, 18" Thread with 19mm 3/8 Circle R/C Needle. Black. Box of 12.


UNIFY Premium+ Plain Gut Surgical Sutures, Size 5/0, 18" Thread with 13mm 3/8 Circle R/C Needle. Beige. Box of 12.


UNIFY PGA Surgical Sutures, Size 4/0, 18" Thread with 19mm 3/8 Circle R/C Needle. Undyed. Box of 12.


UNIFY Premium+ Plain Gut Surgical Sutures, Size 6/0, 18" Thread with 13mm 3/8 Circle R/C Needle. Beige. Box of 12.


UNIFY Polypropylene Surgical Sutures, Size 6/0, 18" Thread with 13mm 3/8 Circle R/C Needle. Blue. Box of 12.


UNIFY Nylon Surgical Sutures, Size 5/0, 18" Thread with 13mm 3/8 Circle R/C Needle. Black. Box of 12.


UNIFY Polypropylene Surgical Sutures, Size 4/0, 18" Thread with 19mm 3/8 Circle R/C Needle. Blue. Box of 12.


UNIFY PGA Surgical Sutures, Size 5/0. 18" Thread with 13mm 3/8 Circle R/C Needle. Undyed. Box of 12.


UNIFY PGA Surgical Sutures, Size 3/0, 18" Thread with 19mm 3/8 Circle R/C Needle. Violet. Box of 12.


UNIFY Polypropylene Surgical Sutures, Size 5/0, 18" Thread with 13mm 3/8 Circle R/C Needle. Blue. Box of 12.


UNIFY PGA Surgical Sutures, Size 3/0, 18" Thread with 19mm 3/8 Circle R/C Needle. Undyed. Box of 12.


UNIFY PGCL Surgical Sutures, Size 5/0, 18" Thread with 13mm 3/8 Circle R/C Needle. Undyed. Box of 12.


UNIFY PGCL Surgical Sutures, Size 4/0, 18" Thread with 13mm 3/8 Circle R/C Needle. Undyed. Box of 12.


UNIFY Premium+ PGCL Surgical Sutures, Size 4/0, 18" Thread with 13mm 3/8 Circle R/C Needle. Undyed. Box of 12.


UNIFY Nylon Surgical Sutures, Size 4/0, 10" Thread with 19mm 3/8 Circle R/C Needle. Black. Box of 12.


UNIFY PGCL Surgical Sutures, Size 4/0, 18" Thread with 19mm 3/8 Circle R/C Needle. Violet. Box of 12.


UNIFY Nylon Surgical Sutures, Size 3/0, 18" Thread with 19mm 3/8 Circle R/C Needle. Black. Box of 12.


UNIFY Premium+ Nylon Surgical Sutures, Size 4/0, 18" Thread with 19mm 3/8 Circle R/C Needle. Black. Box of 12.


AD SURGICAL Universal Sterile Surgical Drapes


UNIFY PGCL Surgical Sutures, Size 4/0, 18" Thread with 19mm 3/8 Circle R/C Needle. Undyed. Box of 12.


UNIFY Premium+ Fast Absorbing Gut Surgical Sutures, Size 5/0, 18" Thread with 13mm 3/8 Circle R/C Needle. Beige. Box of 12.


UNIFY PREMIUM+ PDO Surgical Sutures, Size 3/0, 18" Thread with 19mm 3/8 Circle R/C Needle. Violet. Box of 12.


UNIFY Premium+ Chromic Gut Surgical Sutures, Size 5/0, 18" Thread with 13mm 3/8 Circle R/C Needle. Brown. Box of 12.


UNIFY Nylon Surgical Sutures, Size 6/0, 18" Thread with 13mm 3/8 Circle R/C Needle. Black. Box of 12.


UNIFY Premium+ PGA Surgical Sutures, Size 3/0, 18" Thread with 19mm 3/8 Circle R/C Needle. Undyed. Box of 12.


UNIFY PGCL Surgical Sutures, Size 3/0, 18" Thread with 19mm 3/8 Circle R/C Needle. Undyed. Box of 12.


UNIFY PGA Surgical Sutures, Size 4/0, 18" Thread with 13mm 3/8 Circle R/C Needle. Undyed. Box of 12.


UNIFY PGA Surgical Sutures,Size 4/0, 18" Thread with 19mm 3/8 Circle R/C Needle. Violet. Box of 12.


UNIFY PDO Surgical Sutures, Size 2/0, 30" Thread with 24mm 3/8 Circle R/C Needle. Violet. Box of 12.


UNIFY Nylon Surgical Sutures, Size 4/0, 18" Thread with 13mm 3/8 Circle R/C Needle. Black. Box of 12.

